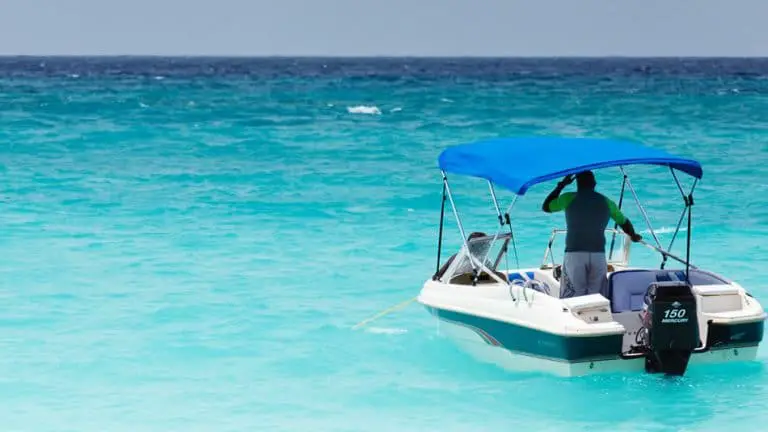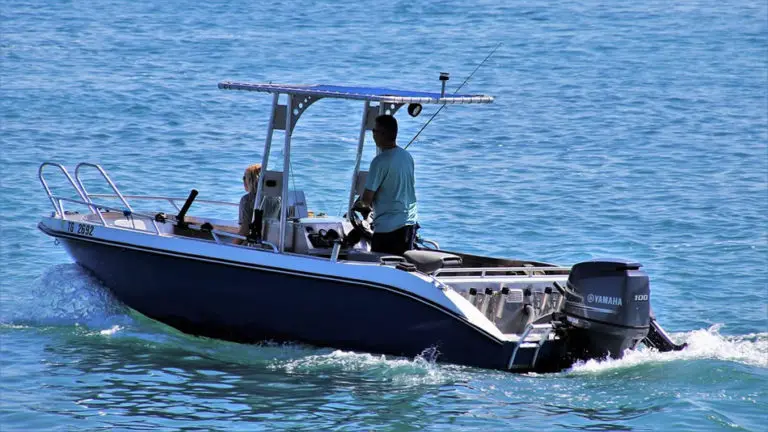
DIY – Remove and Change a Boat Propeller Quick and Easily
If you’ve never had to remove or change a boat propeller before, then consider yourself lucky. There are a few reasons why you might have to change or remove your boat propeller. For example, you might have gone through a shallow part of the lake or river and found yourself a rock. This type of thing can damage your propellers. Or you might have run over an old fishing line someone left out in the water, and it’s now wrapped itself around your propeller.
Whatever the reason might be, don’t be afraid to try removing or replacing the propeller yourself. As long as you are careful, you don’t have to call a professional.
How to Remove And Change an Outboard Propeller
 Tools you will need:
- Needle nose pliers
- Prop Wrench
- Hammer
- Clean Rag
- A piece of wood 2×4 / wooden block
- Quicksilver Marine Grease
- New propeller (if applicable)
Step 1: Trip the kill switch – Before you start working on the propeller, it is always recommended that you trip the kill switch on the boat. You can also place the gear in neutral as an extra precaution.
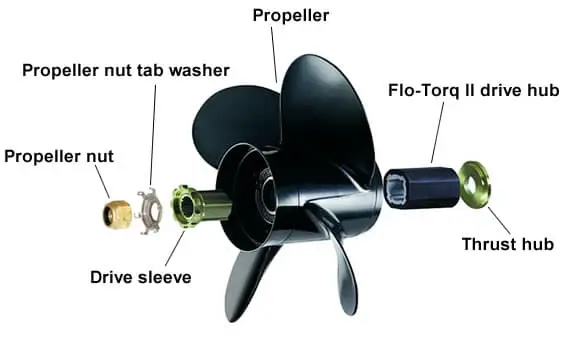
Step 2: Bend back propeller nut tab washer – Take a pair of needle nose pliers and bend back the tabs. You don’t have to bend them all of the ways out, just enough so they are out of the grooves.
Step 3: Block the prop – Take a piece of wood or something else that you can use to hold the propeller still from spinning around.
Step 4: Remove the prop nut – Use the prop wrench to unloosen the prop nut. Remember the old saying, “lefty loosey, righty tighty.”
Step 5: Remove the propeller nut tab washer – Slide the propeller nut tab washer off and spacers off and set it with the propeller nut.
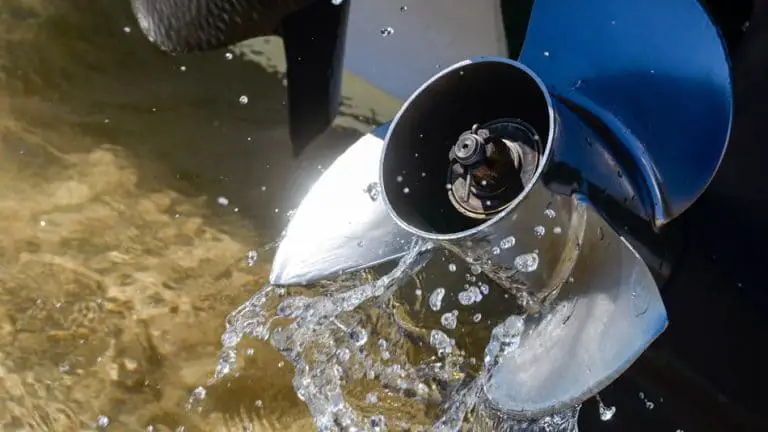
Step 6: Pull the prop off -First, take away the piece of wood or whatever you used to hold the prop from turning. Using two hands, grab the propeller on either side and slowly pull it off. If it’s undamaged, then place it next to the other items you’ve removed, keeping it turned in the same position as it was removed. If the propeller is damaged then go ahead and toss it to the side out of the way for now.
Step 7: Remove thrust hub – Slide the thrust hub off. If it’s tough to move, give it a little tab, and it should pop free. Be careful not to hit the shaft. Wipe the thrust hub down with a rag. Inspect if for wear. If it looks good, place it next to the other items you’ve removed.
Step 8: Wipe down the shaft – Take your rag and wipe down the shaft making sure it’s clean and clear of any dirt or gunk. Grip the shaft with the cloth and give it a turn. Make sure it’s turning nice and smooth.
Step 9: Inspect the area – After you’ve removed the propeller, take a good look all around to make sure there is nothing wrapped around the shaft, such as a fishing line or something.
Step 10: Grease the shaft – Take some Quicksilver Marine Grease and apply it all over the shaft. Take your rag and help spread it around and get it in the splines of the shaft.
Step 11: Slide on the thrust hub – Take a little bit of grease and wipe it around the thrust hub, then slide it down the shaft into place.
Step 12: Put on the propeller – Holding the propeller with two hands, line up the splines on the shaft with the splines on the inside propeller, and slowly slide the propeller back into place. If you are using a new propeller, you might have to remove the Flo-Torq II drive hub from within the old propeller. Make sure you put it on correctly as per the instructions.
Step 13: Slide the propeller nut tab washer, and propeller nut on – Now going in the reverse way that took these off, go ahead and put the propeller nut tab washer on first, and then the propeller nut. Once you get the prop nut back on you should take your piece of wood and once again wedge it in to prevent the propeller from spinning. Now tighten the prop nut. Tighten it, but do not over tighten it.
That’s it! It’s a very easy, and straightforward job.
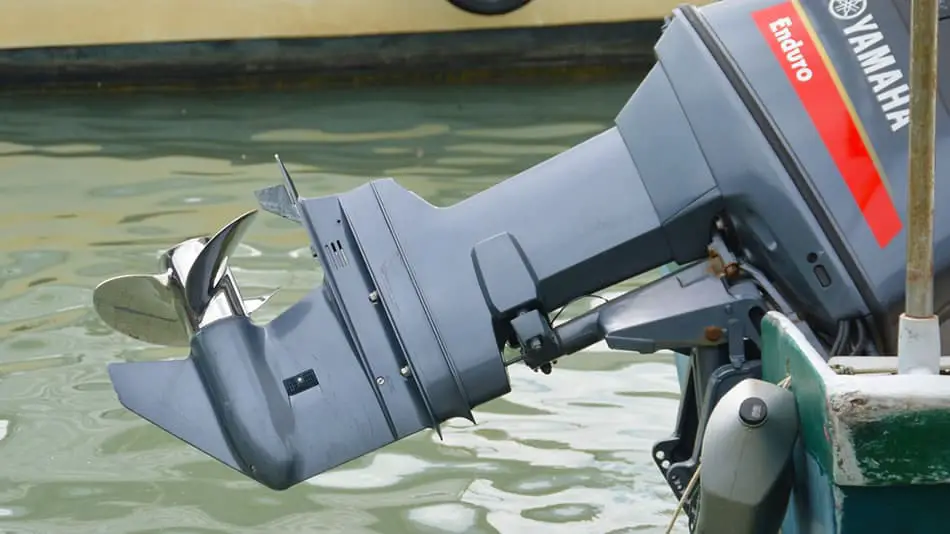
Depending on your motor and style of propeller
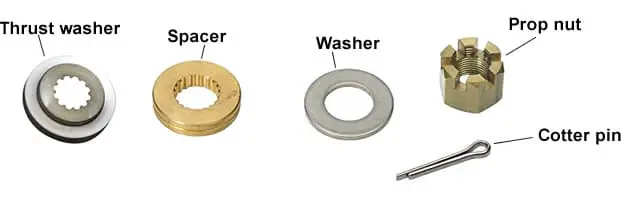
Alternatively, your motor style and propeller set up could be different from the steps outlined above. For example, instead of using a propeller nut tab washer, you could have a cotter pin instead. When dealing with this style of the motor assembly, it’s essential to remove the parts and line them up, so they are in the same order as you remove them.
You can follow the steps above to remove or change your outboard propeller.
How to Remove And Change an Inboard Propeller
Tools you will need:
- New propeller (if applicable)
- Hammer
- Clean Rag
- ACME clamp prop puller
- Adjustable wrench
- A piece of wood 2×4 / wooden block
- Needle nose pliers
- Quicksilver Marine Grease
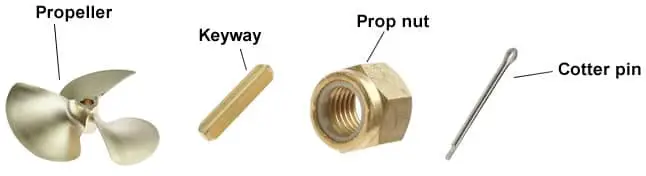
Step 1: Remove the cotter pin – Using a pair of needle nose pliers, carefully remove the cotter pin and set it aside.
Step 2: Block the prop – Take a wooden piece of 2×4 and wedge it up against the propeller to stop it from turning.
Step 3: Loosen the prop nut – Using your adjustable wrench, loosen the prop nut. Give it a couple of turns but do not remove it completely. You want it there for the next step.
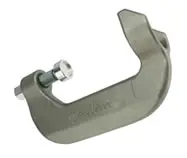
Step 4: Pop the propeller free – Using a tool like the ACME clamp prop puller, you want to pop the propeller free. Place the clamp prop puller in place and give the screw a few turns. As you slowly turn the screw, this should pop the propeller free. If it doesn’t pop it free, then take your hammer and give a couple of taps to the back part of the clamp. Don’t hit the propeller itself.
Step 5: Remove the prop nut – Take one hand and hold the propeller in place. Now with the other hand unloosen and remove the prop nut.
Step 6: Remove the propeller – Now with two hands, slowly and carefully slide the propeller off. Be careful not to bang or damage the rudder.
Step 7: Inspect the keyway – Take out the keyway and inspect it for damage or wear. If it looks like it should be replaced, then replace it. If it seems okay, then give it a quick wipe down and put it back in the hole on the shaft.
Step 8: Inspect the shaft – With the propeller off, take a look around the shaft and make sure there is nothing wrapped around it, like a fishing line or something.
Step 9: Grease the shaft – Apply some grease all along the shaft.
Step 10: Reinstall the propeller – Get your shaft, and again being very careful not to bang the rudder, slide the propeller back up the shaft. Line the keyway up with the notch in the propeller and push it all the way up until it doesn’t go any further.
Step 11: Put on the prop nut – While holding the propeller with one hand, so it doesn’t slide down the shaft, begin to thread the prop nut back on.
Step 12: Block the propeller – Take the block of wood or 2×4 and block the propeller from turning. Use the adjustable wrench to tighten the prop nut back up. Be careful not to over tighten it.
Step 13: Insert the cotter pin – Slide the cotter pin back in to place. Use the needle nose pliers to bend out the bottom parts of the pin to prevent it from coming back out.
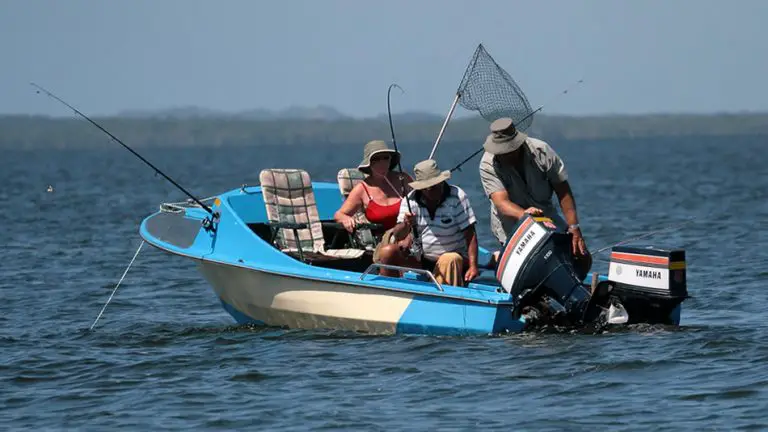
Reasons Why You Might Have to Remove or Change a Boat Propeller
- One indication that your propeller might be damaged is that your steering could feel shaky. If this happens, take a look at the propeller and make sure it’s not bent or dented.
- If you get your fishing line tangled in and around the propeller shaft.
- If you ran over a log, rock or sand.
- If you find that your fuel usage doesn’t seem to go as far as it used to, then there might be some damage to the prop.
- If you are looking to go faster, then you might want to look at getting a new propeller. Propellers are built differently for different speeds and needs.
- At least once or twice a year you should remove the propeller and give the shaft, washers, and spacers a good greasing to help prevent the prop from seizing on.
How to Remove a Seized Propeller
Once and a while you might come across a propeller that is seized on the shaft and won’t budge. If this happens, I’ve heard the best way to get the propeller to move is to spray the shaft and behind the propeller on the shaft with WD40. Let that sit for a few hours or overnight.
Apply a little more WD40, and then using a tool like the ACME clamp prop puller, try to get the propeller to pop free. If it still doesn’t pop loose, then take a hammer and give some taps to the back clamp section of the prop puller. Make sure not to hammer on the propeller or shaft because you could cause damage to those.
If WD40 doesn’t work, I’ve read somewhere that people have tried using brake fluid. Apparently, it is a bit stronger then WD40, although I’ve never tested this theory myself.
Sometimes the corrosion can be all the way down the spline preventing the propeller from budging an inch. If the propeller hasn’t been cared for properly over the years, then this could cause it to seize from corrosion. If this happens, the only option might be to cut it off using an angle grinder.